Setting up Your Project on Seed
We are going to use Seed to automate our serverless deployments and manage our environments.
Start by signing up for a free account here.
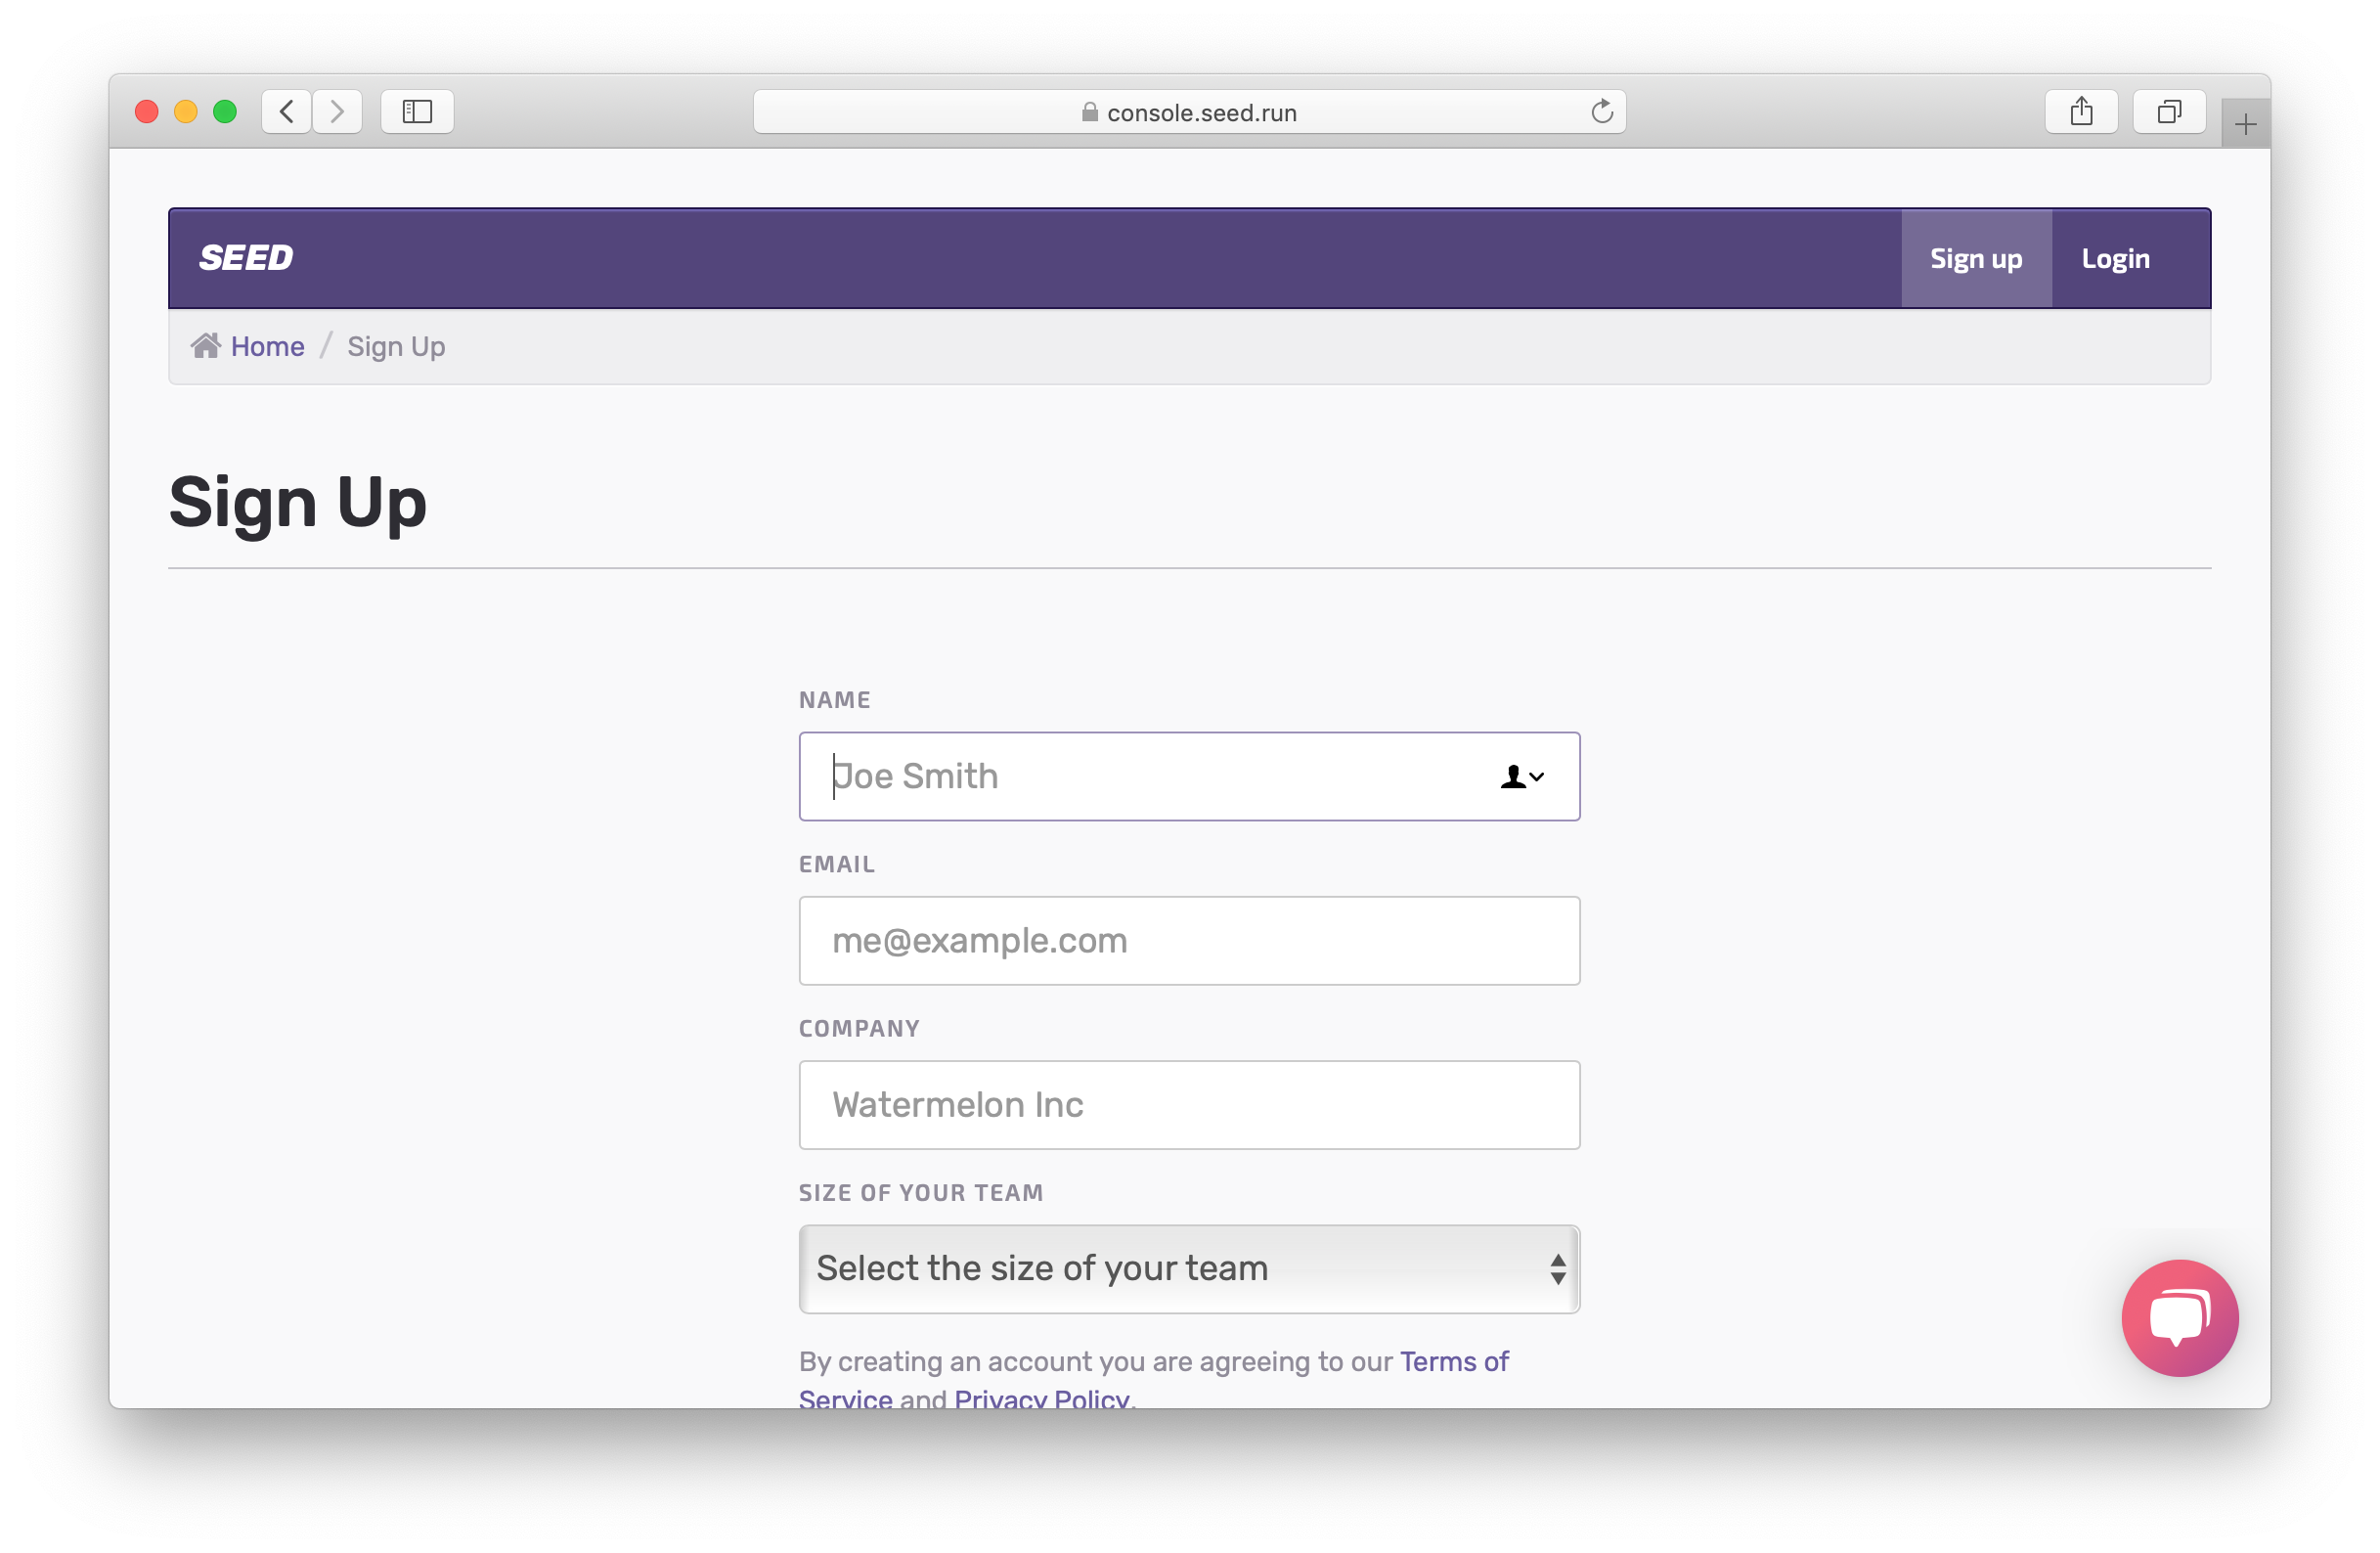
Let’s Add your first app.

Now to add your project, select GitHub as your git provider. You’ll be asked to give Seed permission to your GitHub account.

Select the repo we’ve been using so far.
Next, Seed will scan your repos for a serverless.yml. Hit Add Service to confirm this.
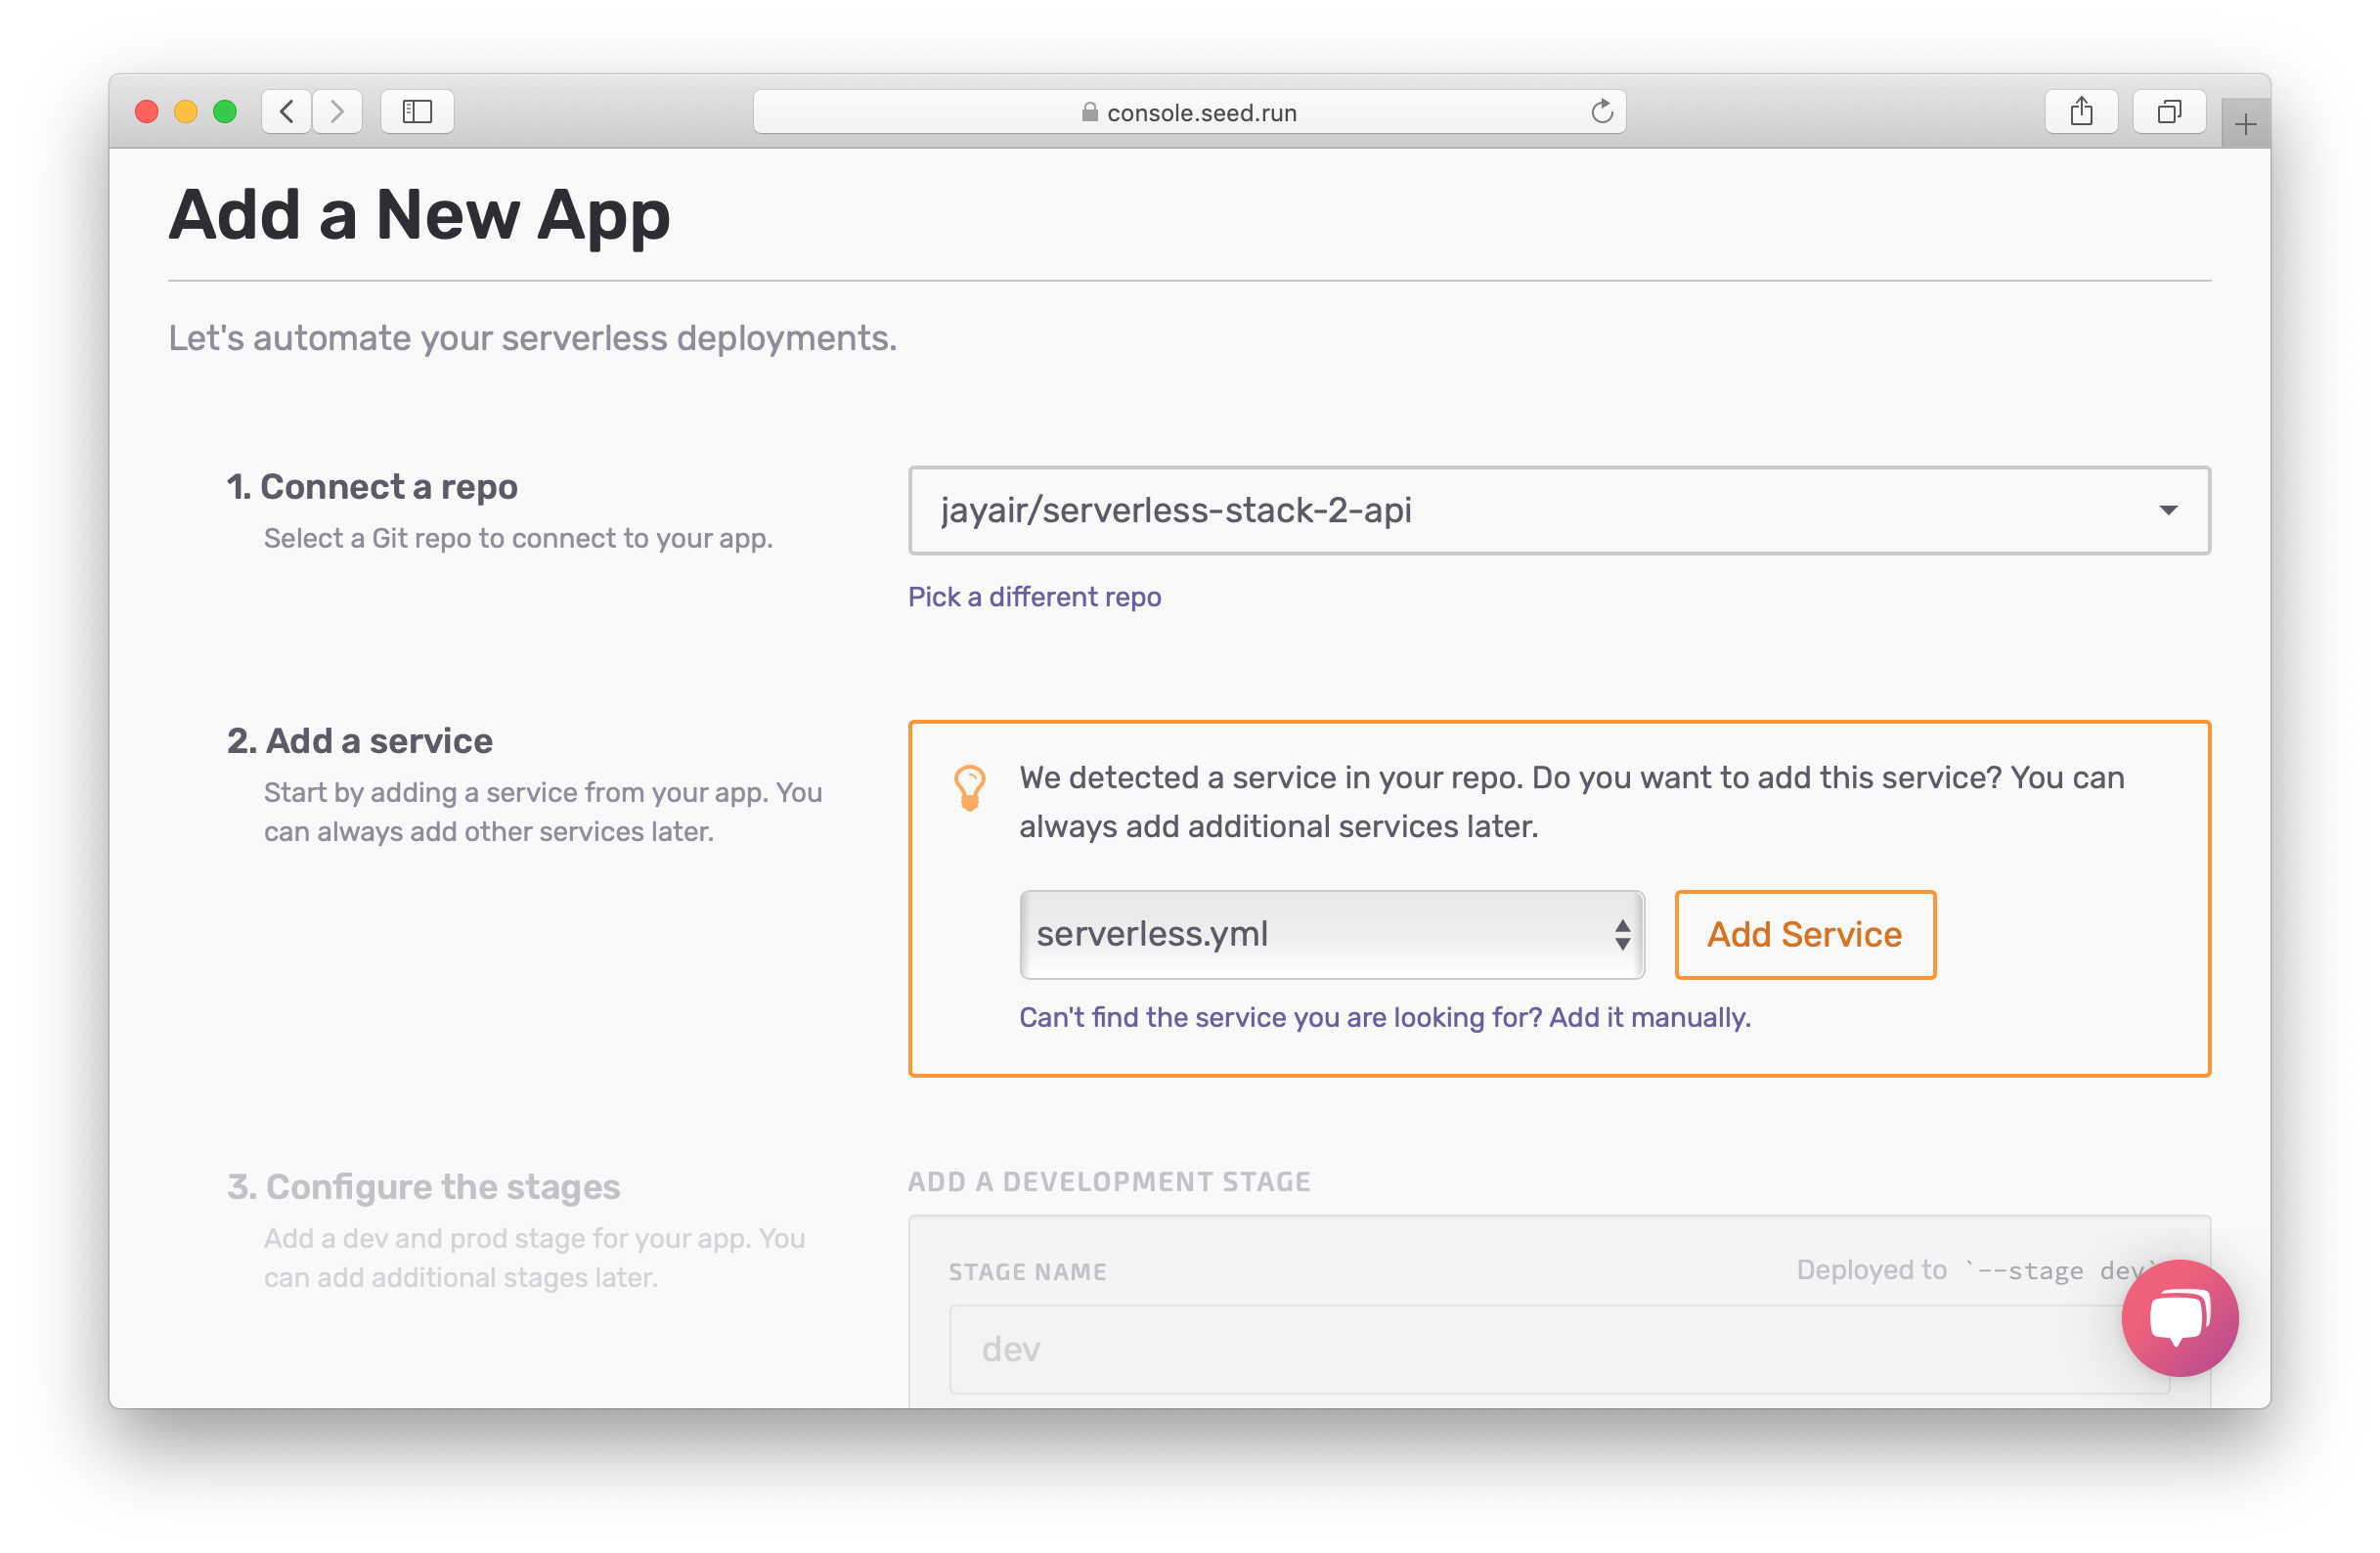
Note that, if your serverless.yml is not in your project root, you will need to change the path.
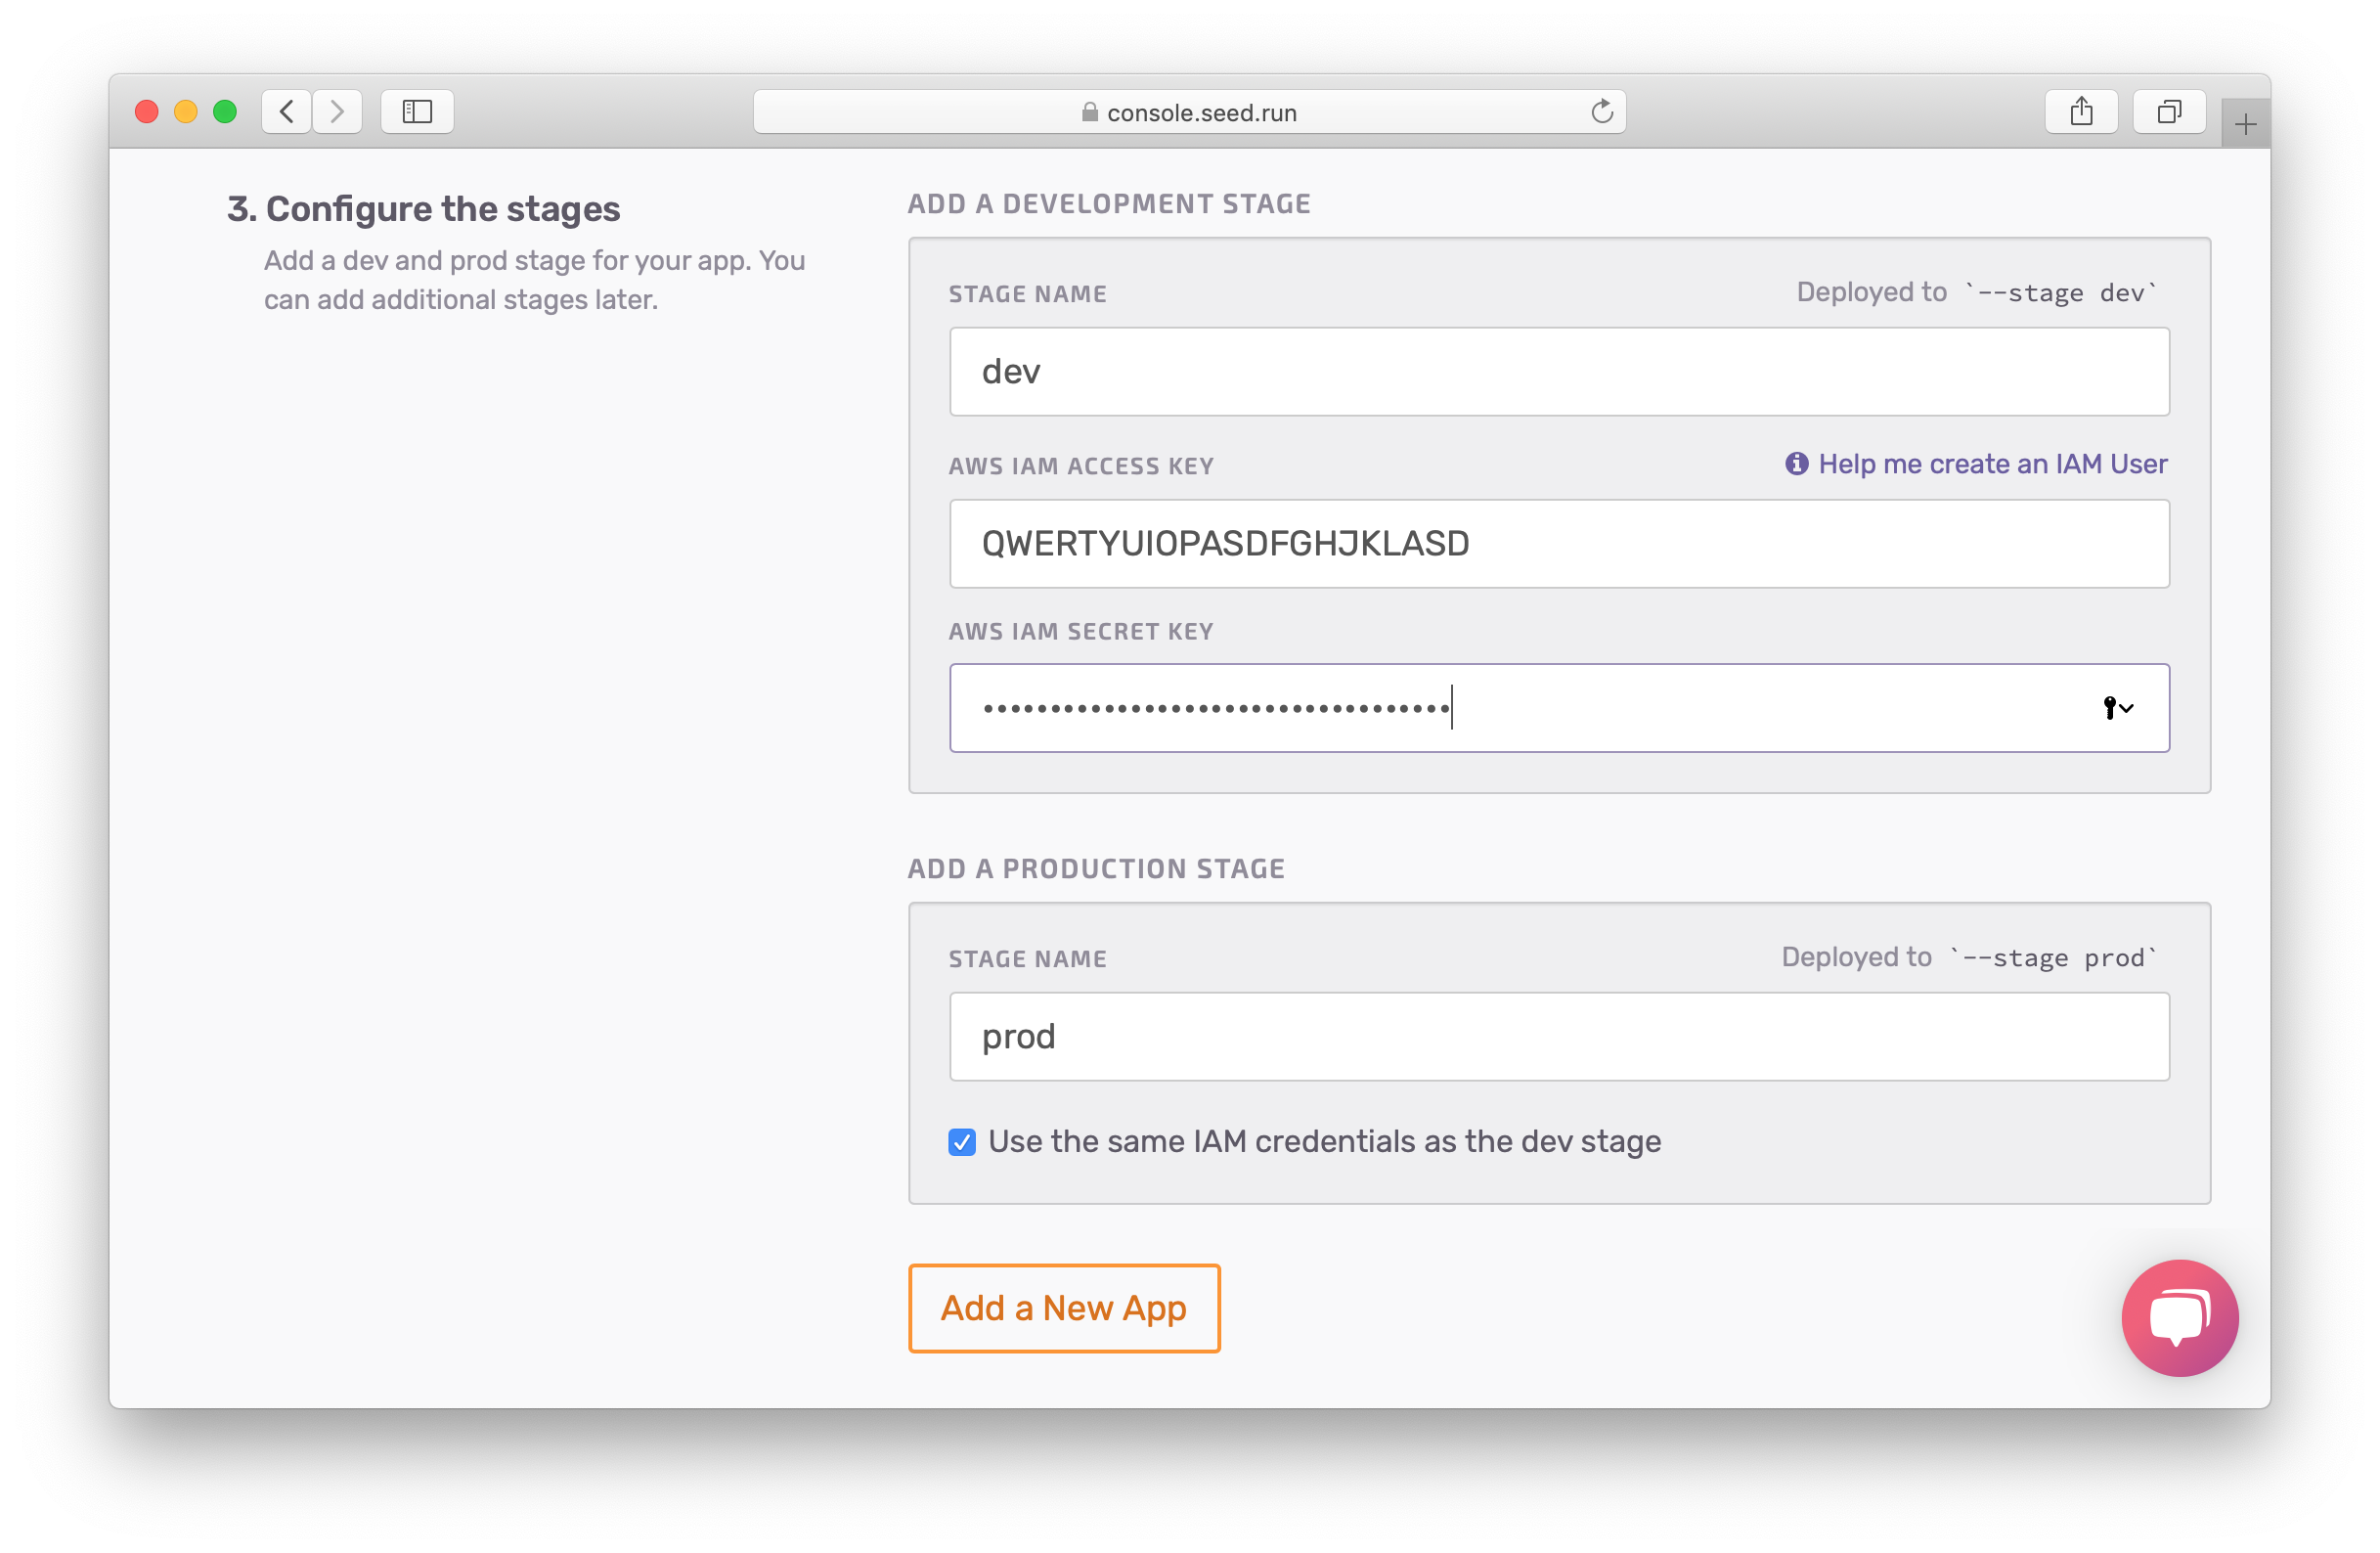
Seed deploys to your AWS account on your behalf. You should create a separate IAM user with exact permissions that your project needs. You can read more about this here. But for now we’ll simply use the one we’ve used in this tutorial.
 Run the following command.
$ cat ~/.aws/credentials
The output should look something like this.
[default]
aws_access_key_id = YOUR_IAM_ACCESS_KEY
aws_secret_access_key = YOUR_IAM_SECRET_KEY
Seed will also create a couple of stages (or environments) for you. By default, it’ll create a dev and a prod stage using the same AWS credentials. You can customize these but for us this is perfect.
Fill in the credentials and click Add a New App.
You new app is ready to go!
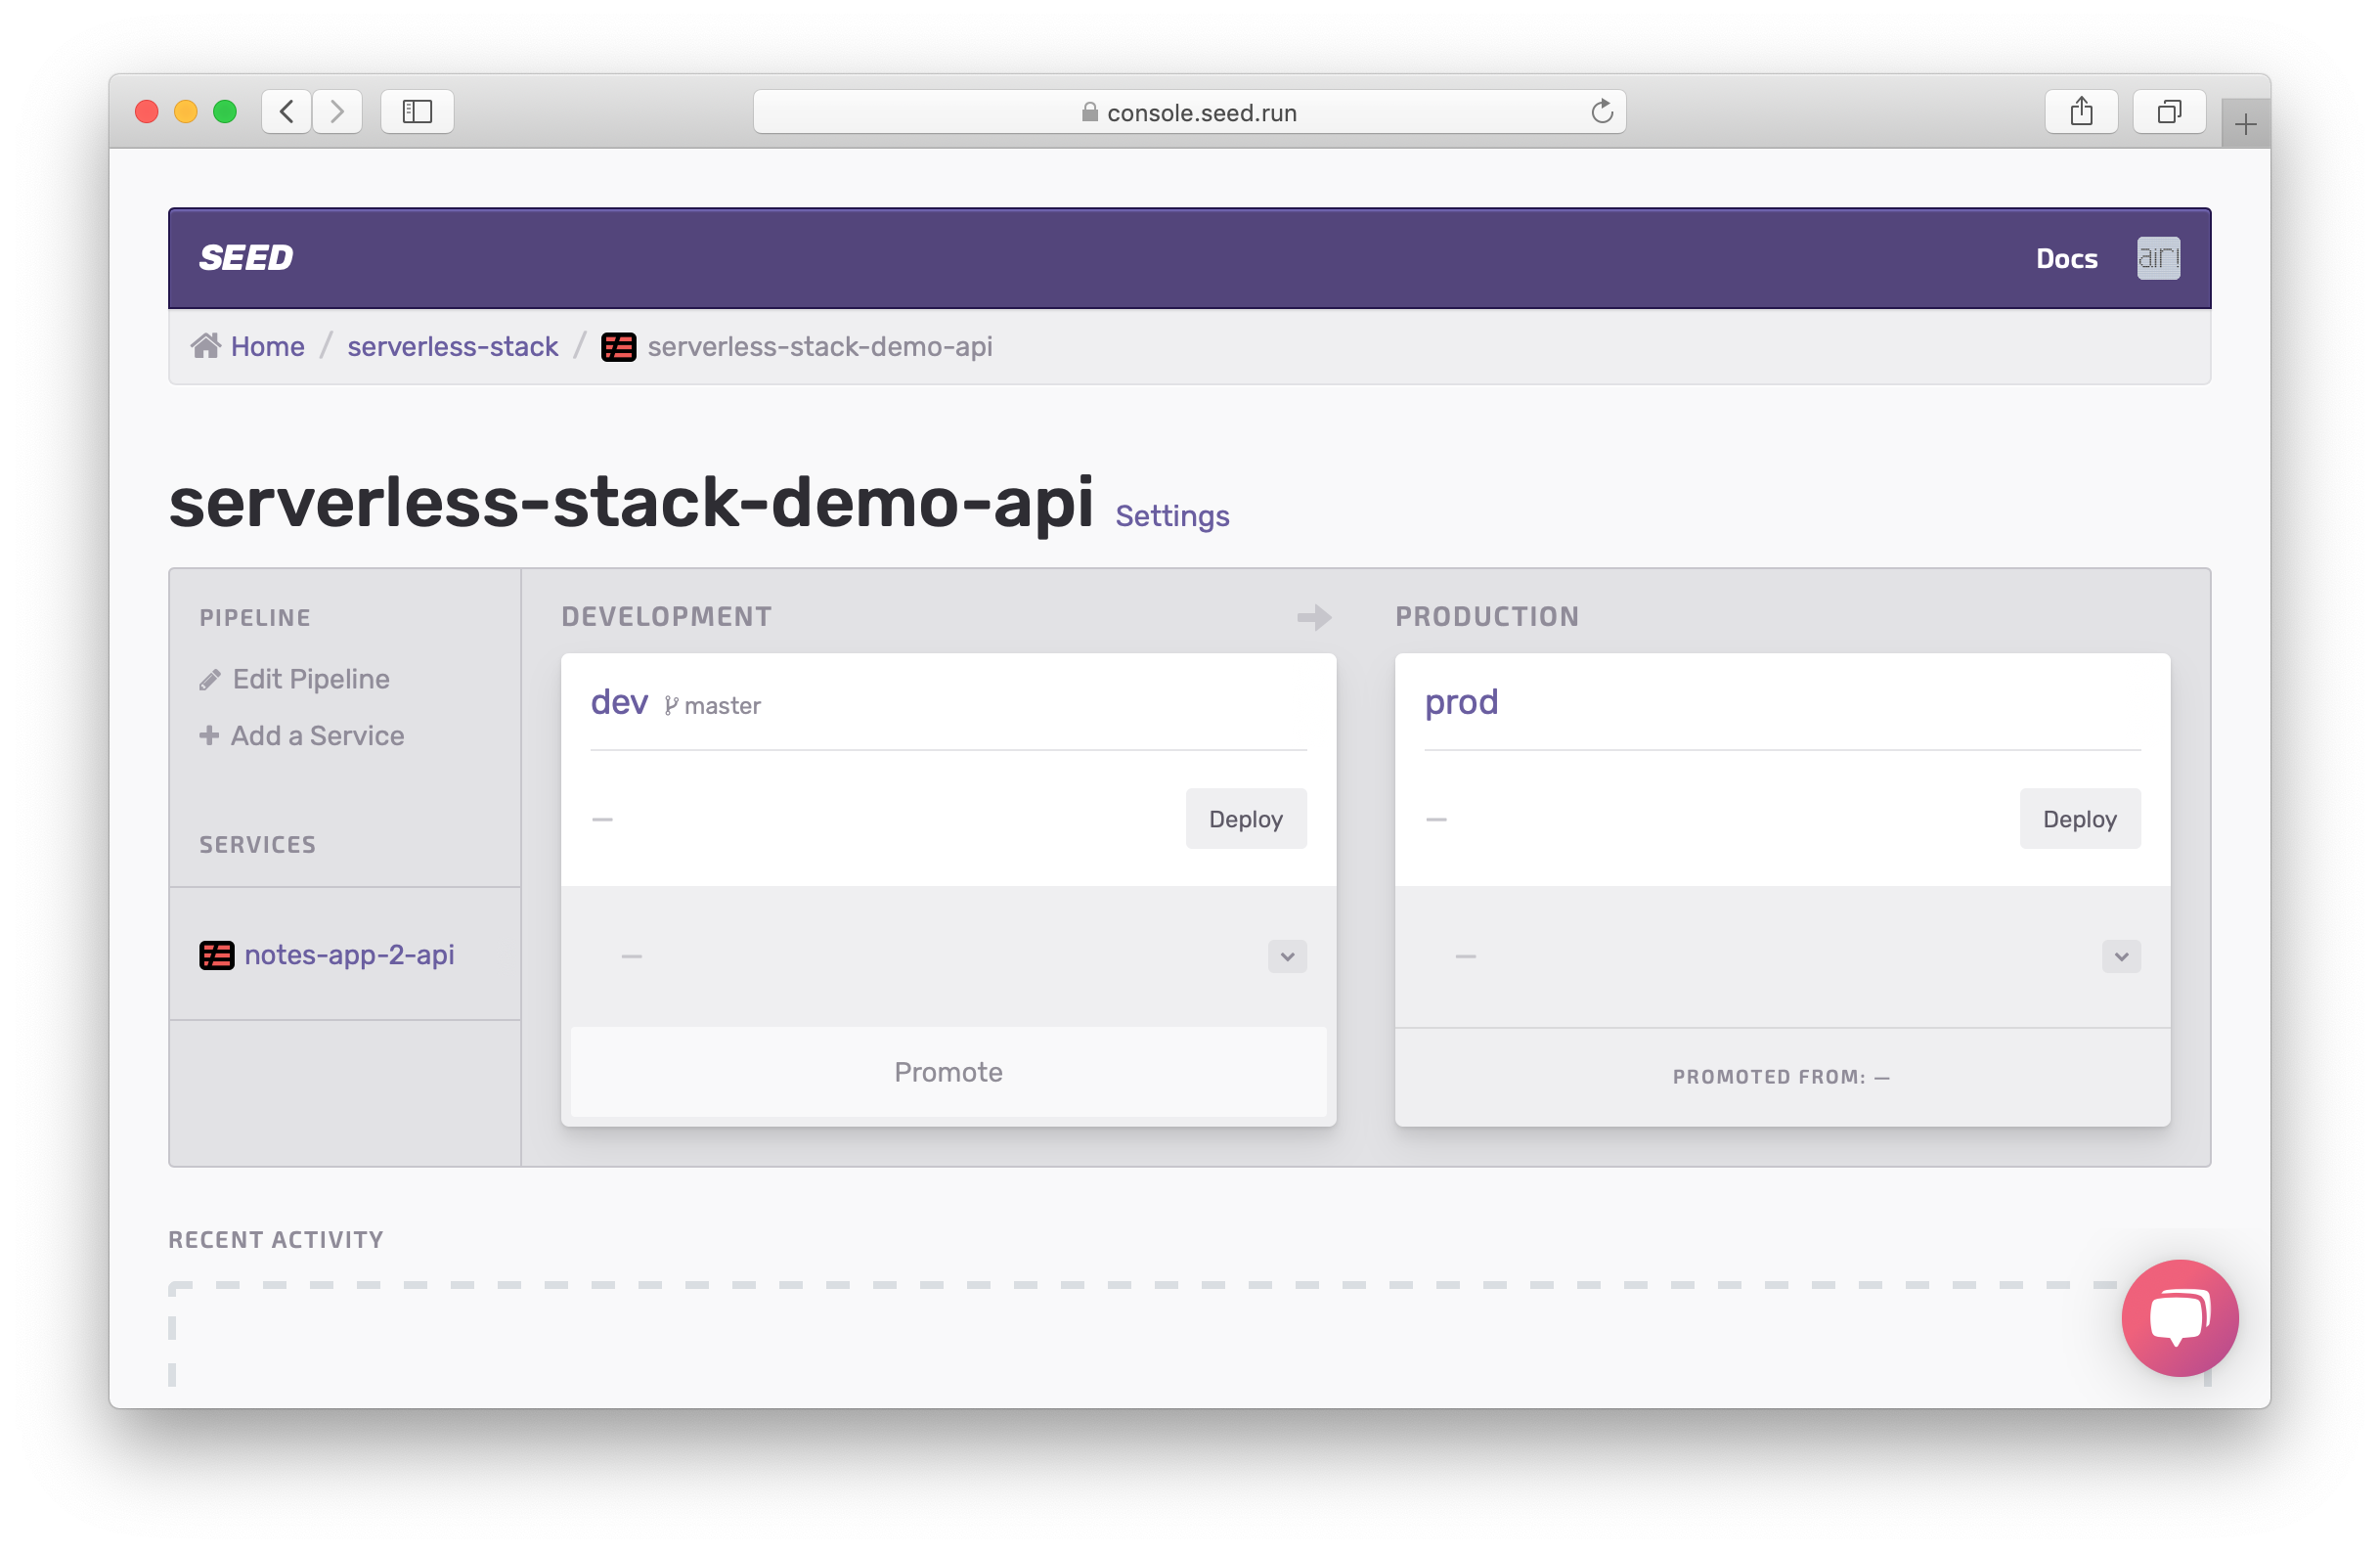
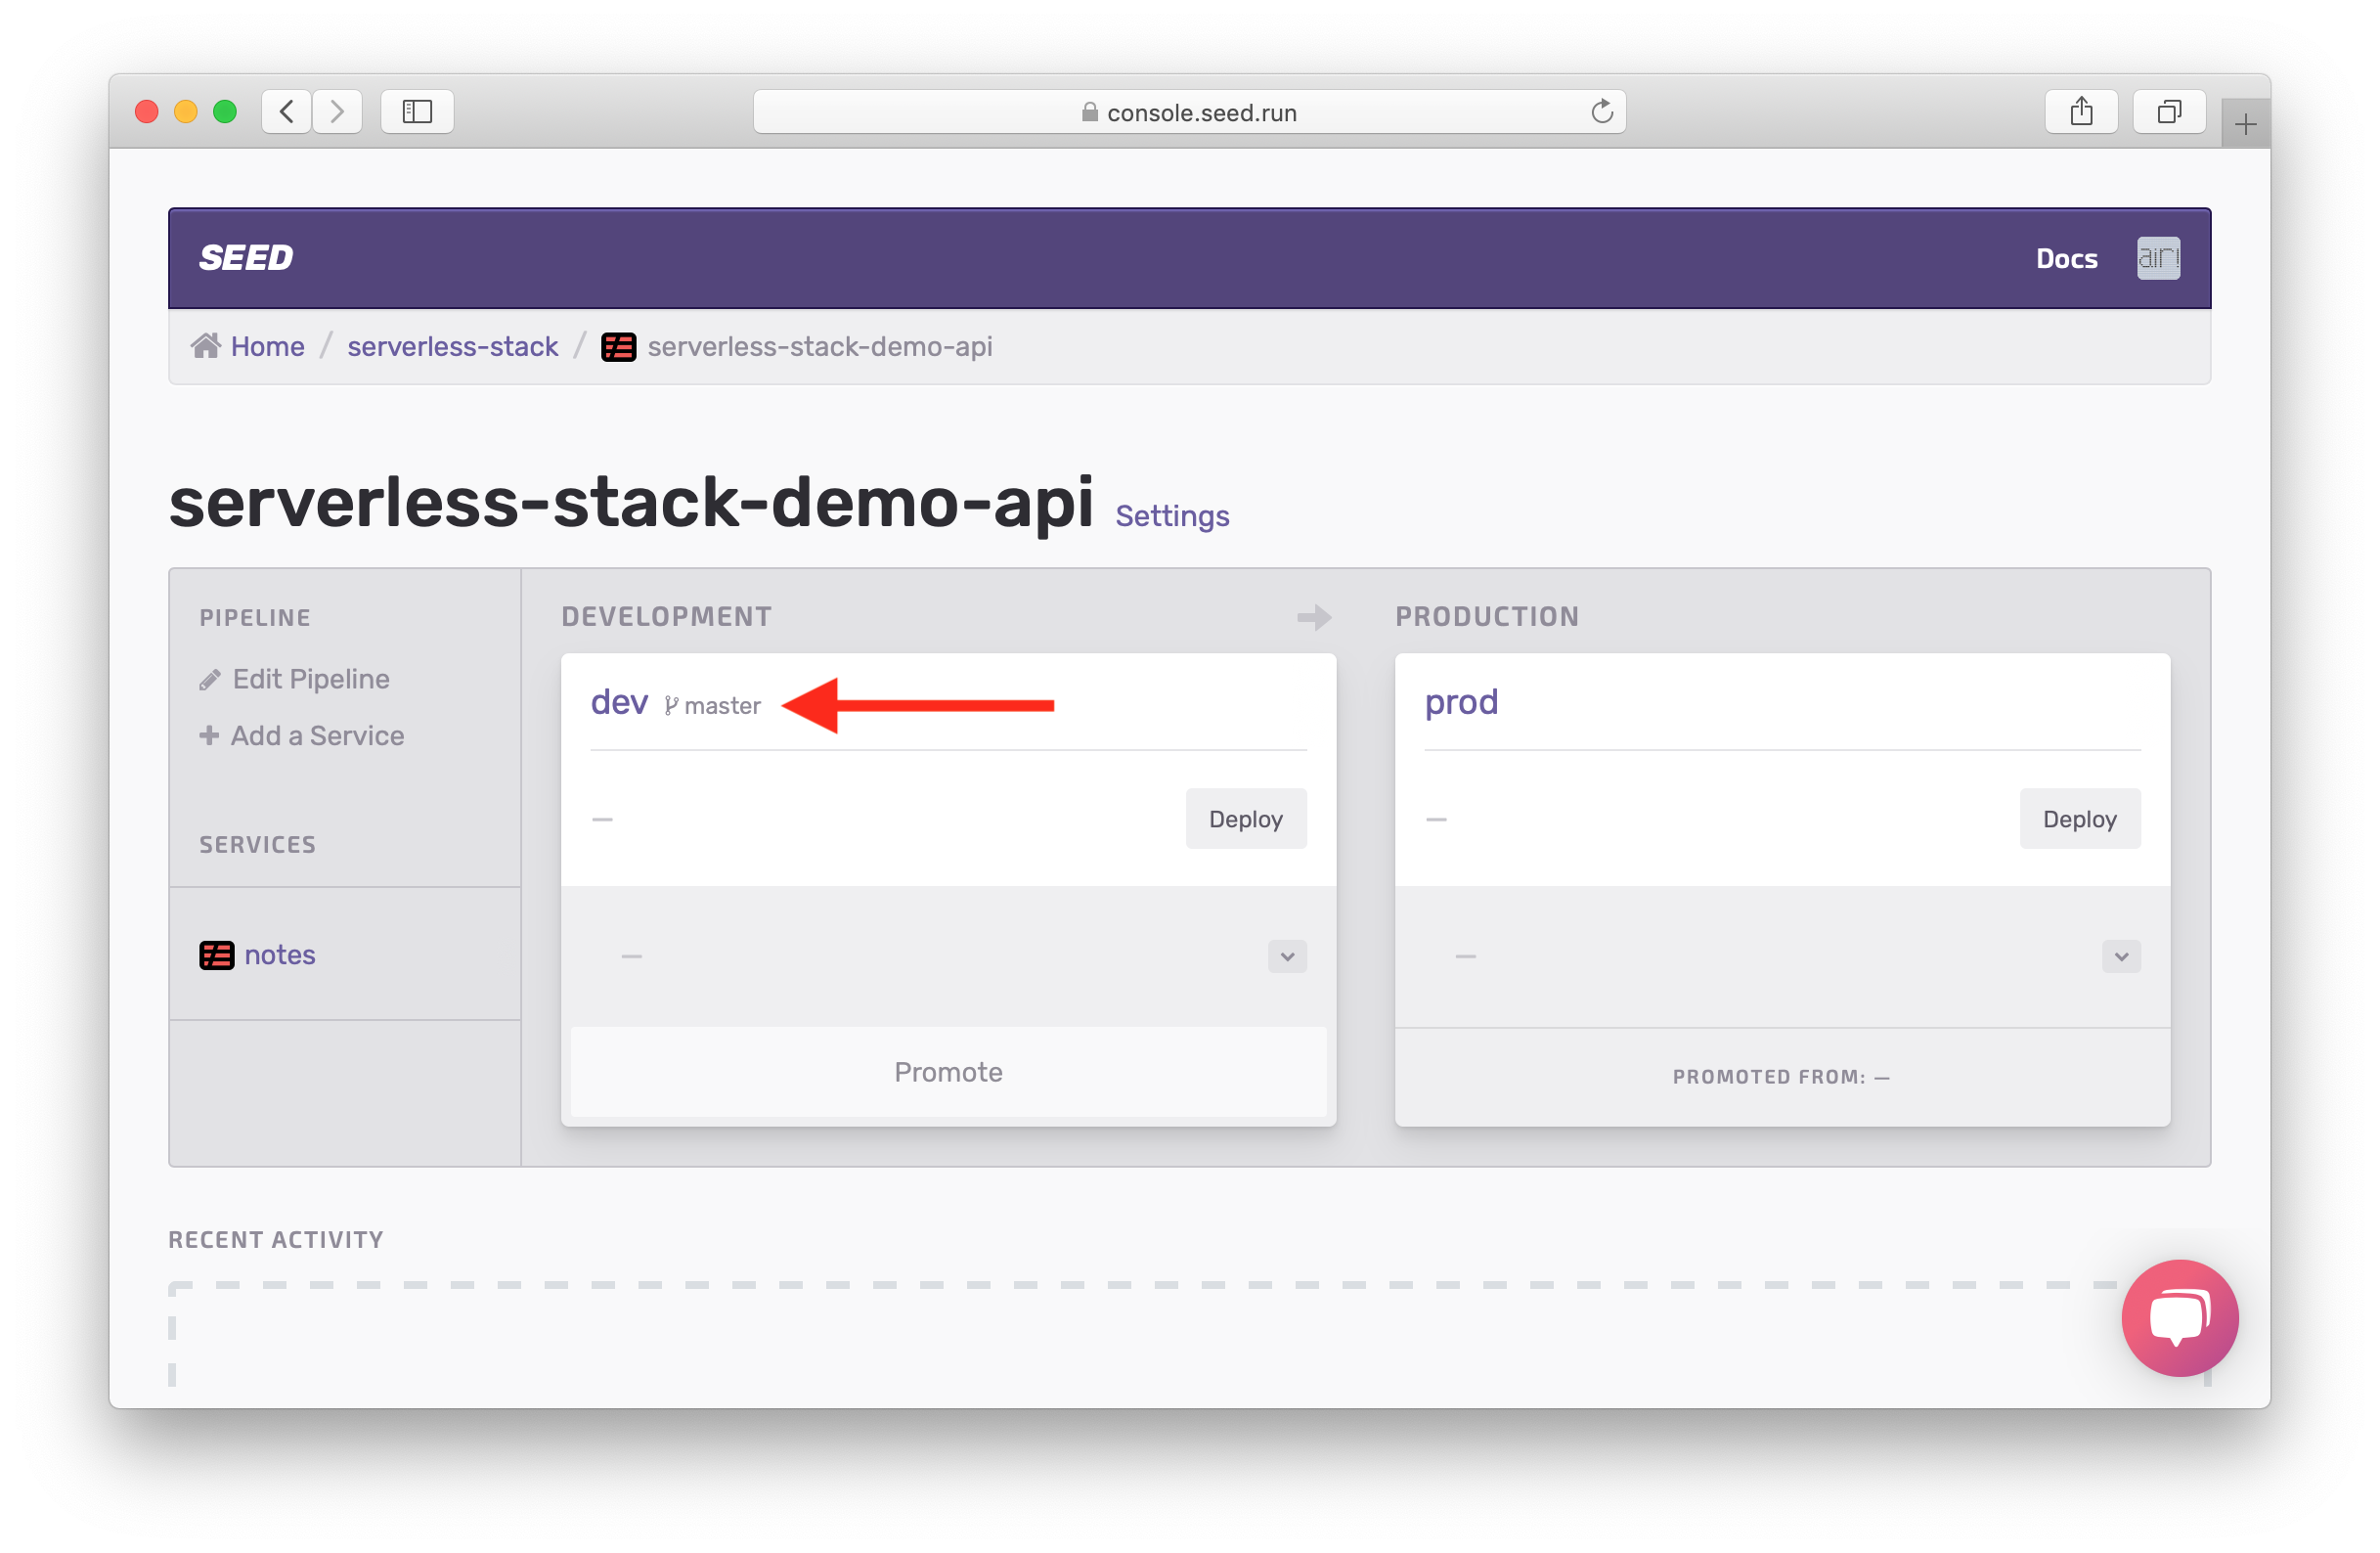
You’ll notice a few things here. First, we have a service called notes-app-2-api. It’s picking up the service name from our serverless.yml. You can choose to change this by clicking on the service and editing its name. A Serverless app can have multiple services within it. A service (roughly speaking) is a reference to a serverless.yml file. In our case we have one service in the root of our repo. You’ll also notice the two stages that have been created.
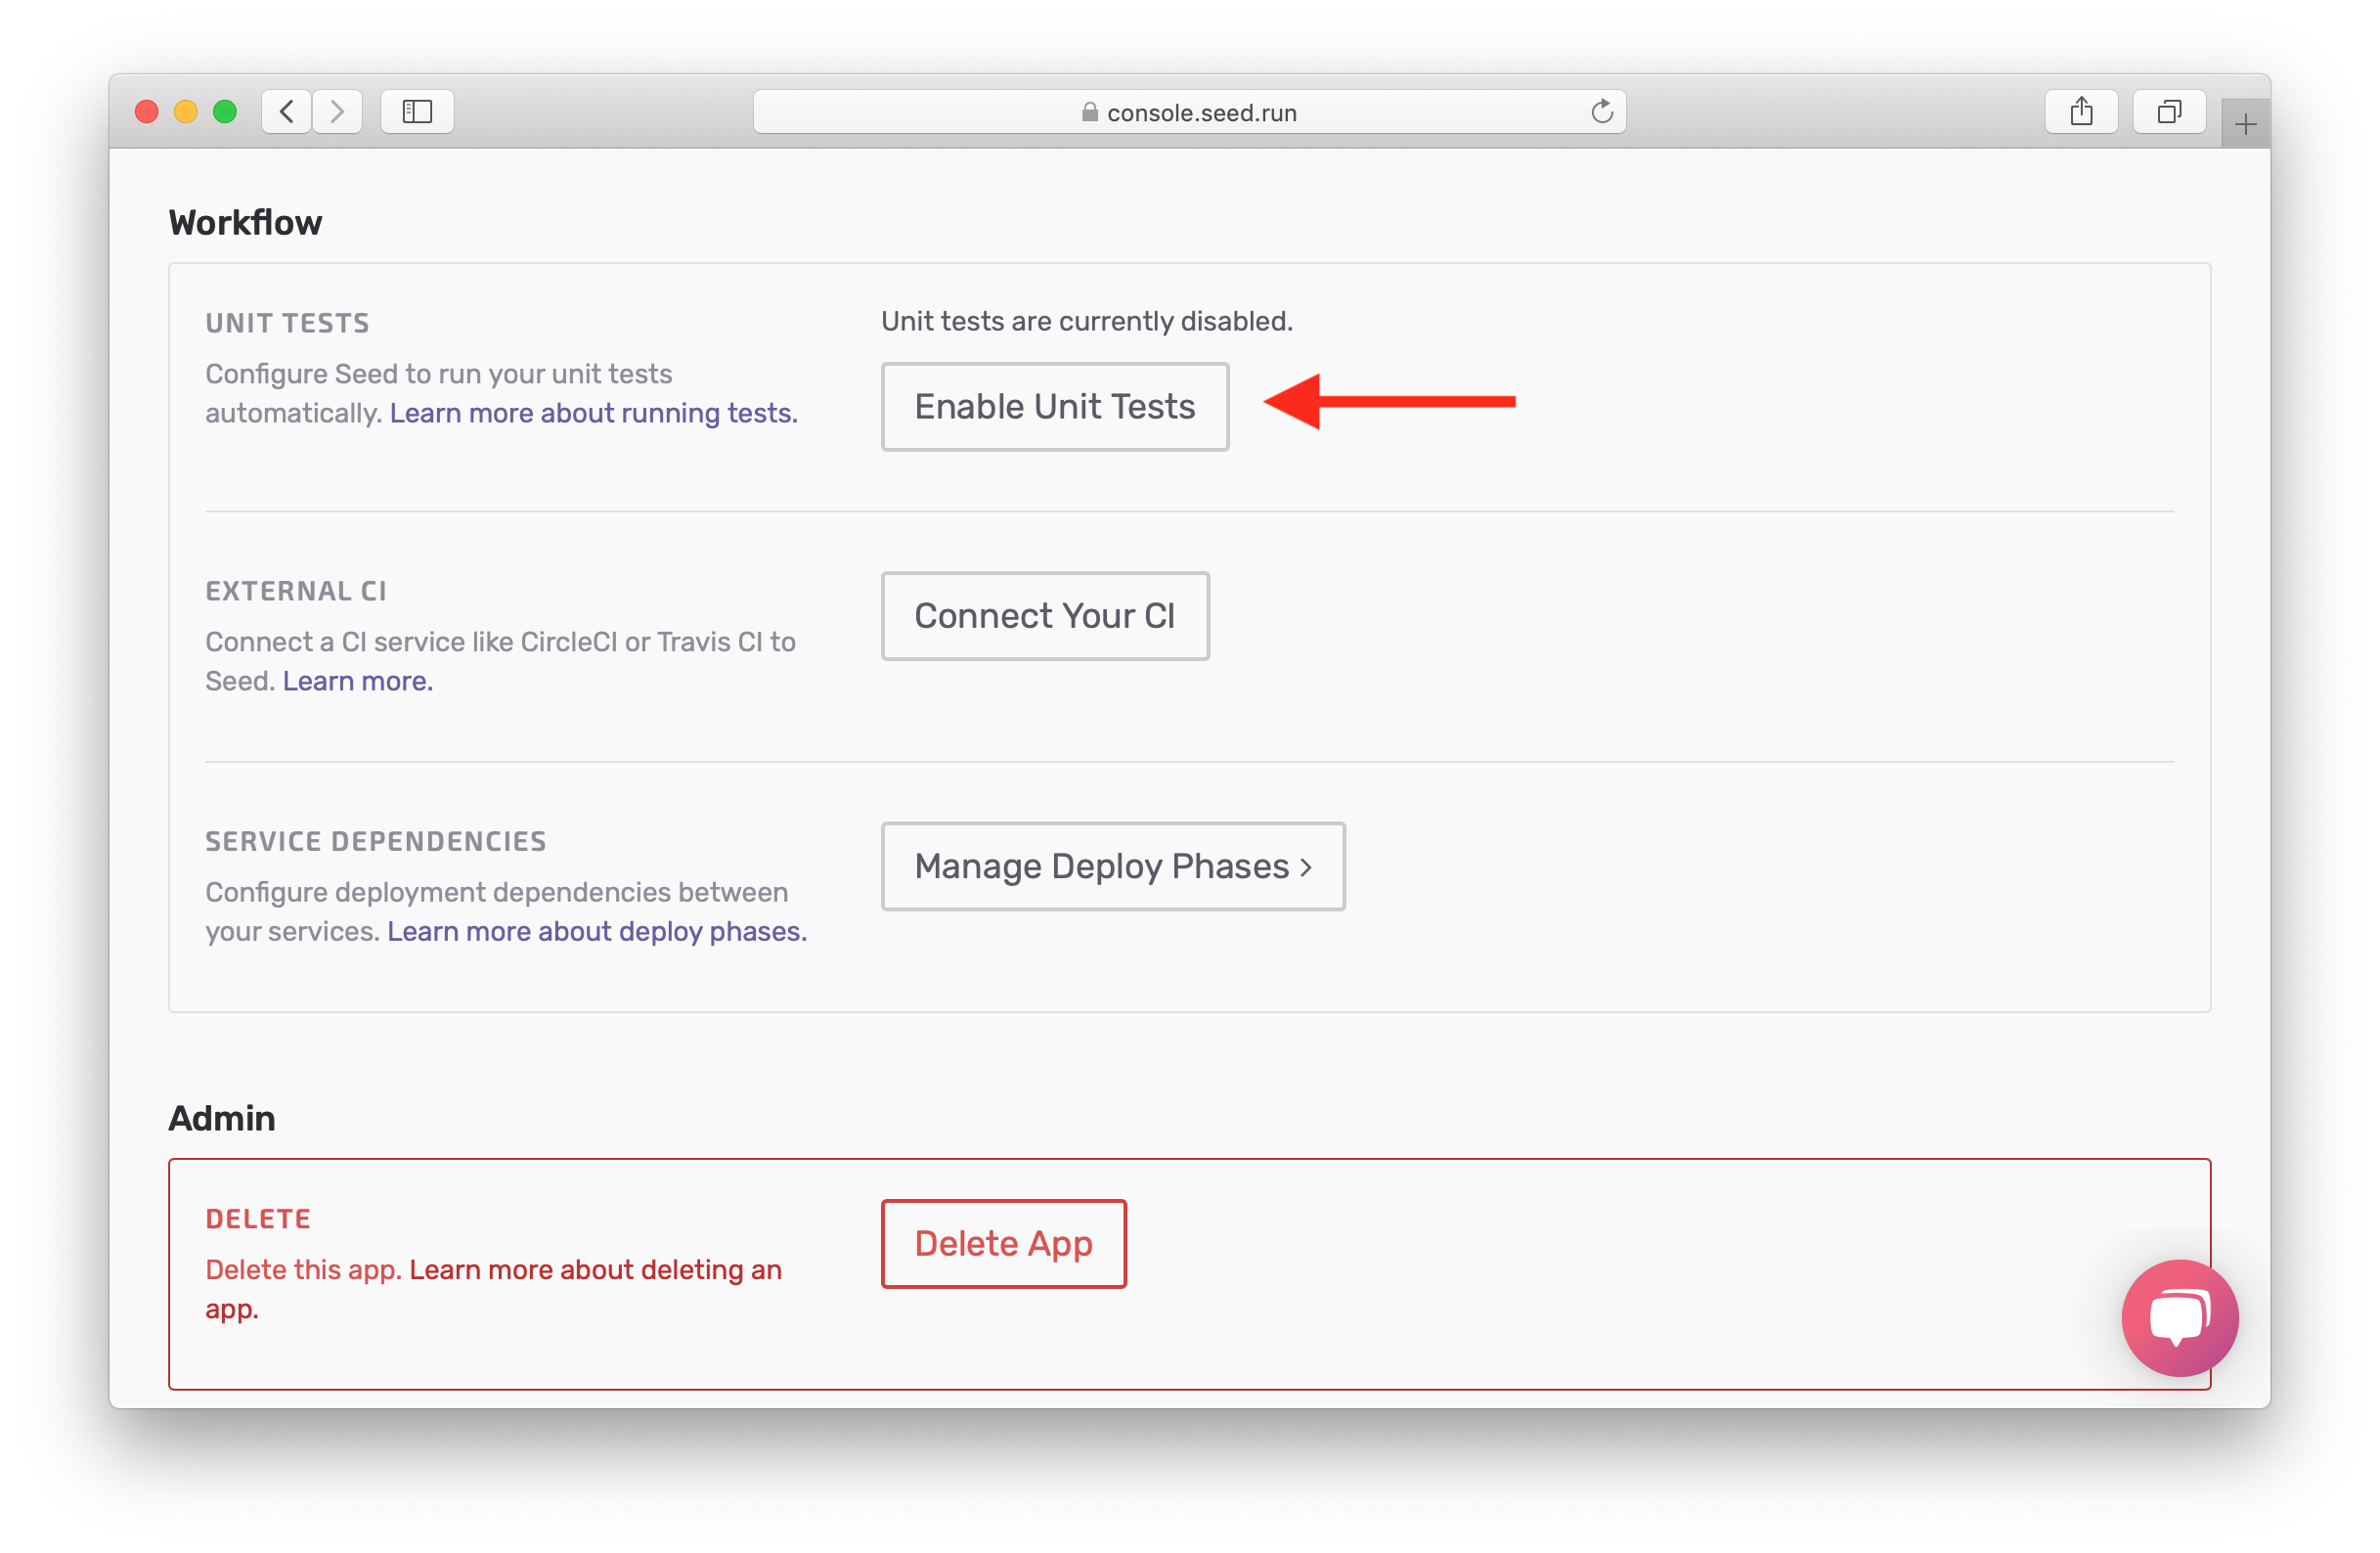
Now before we proceed to deploying our app, we need to enable running unit tests as a part of our build process. You’ll recall that we had added a couple of tests back in the unit tests chapter. And we want to run those before we deploy our app.
To do this, hit the Settings link and click Enable Unit Tests.
Back in our pipeline, you’ll notice that our dev stage is hooked up to master. This means that any commits to master will trigger a build in dev.
Click on dev.
You’ll see that we haven’t deployed to this stage yet.
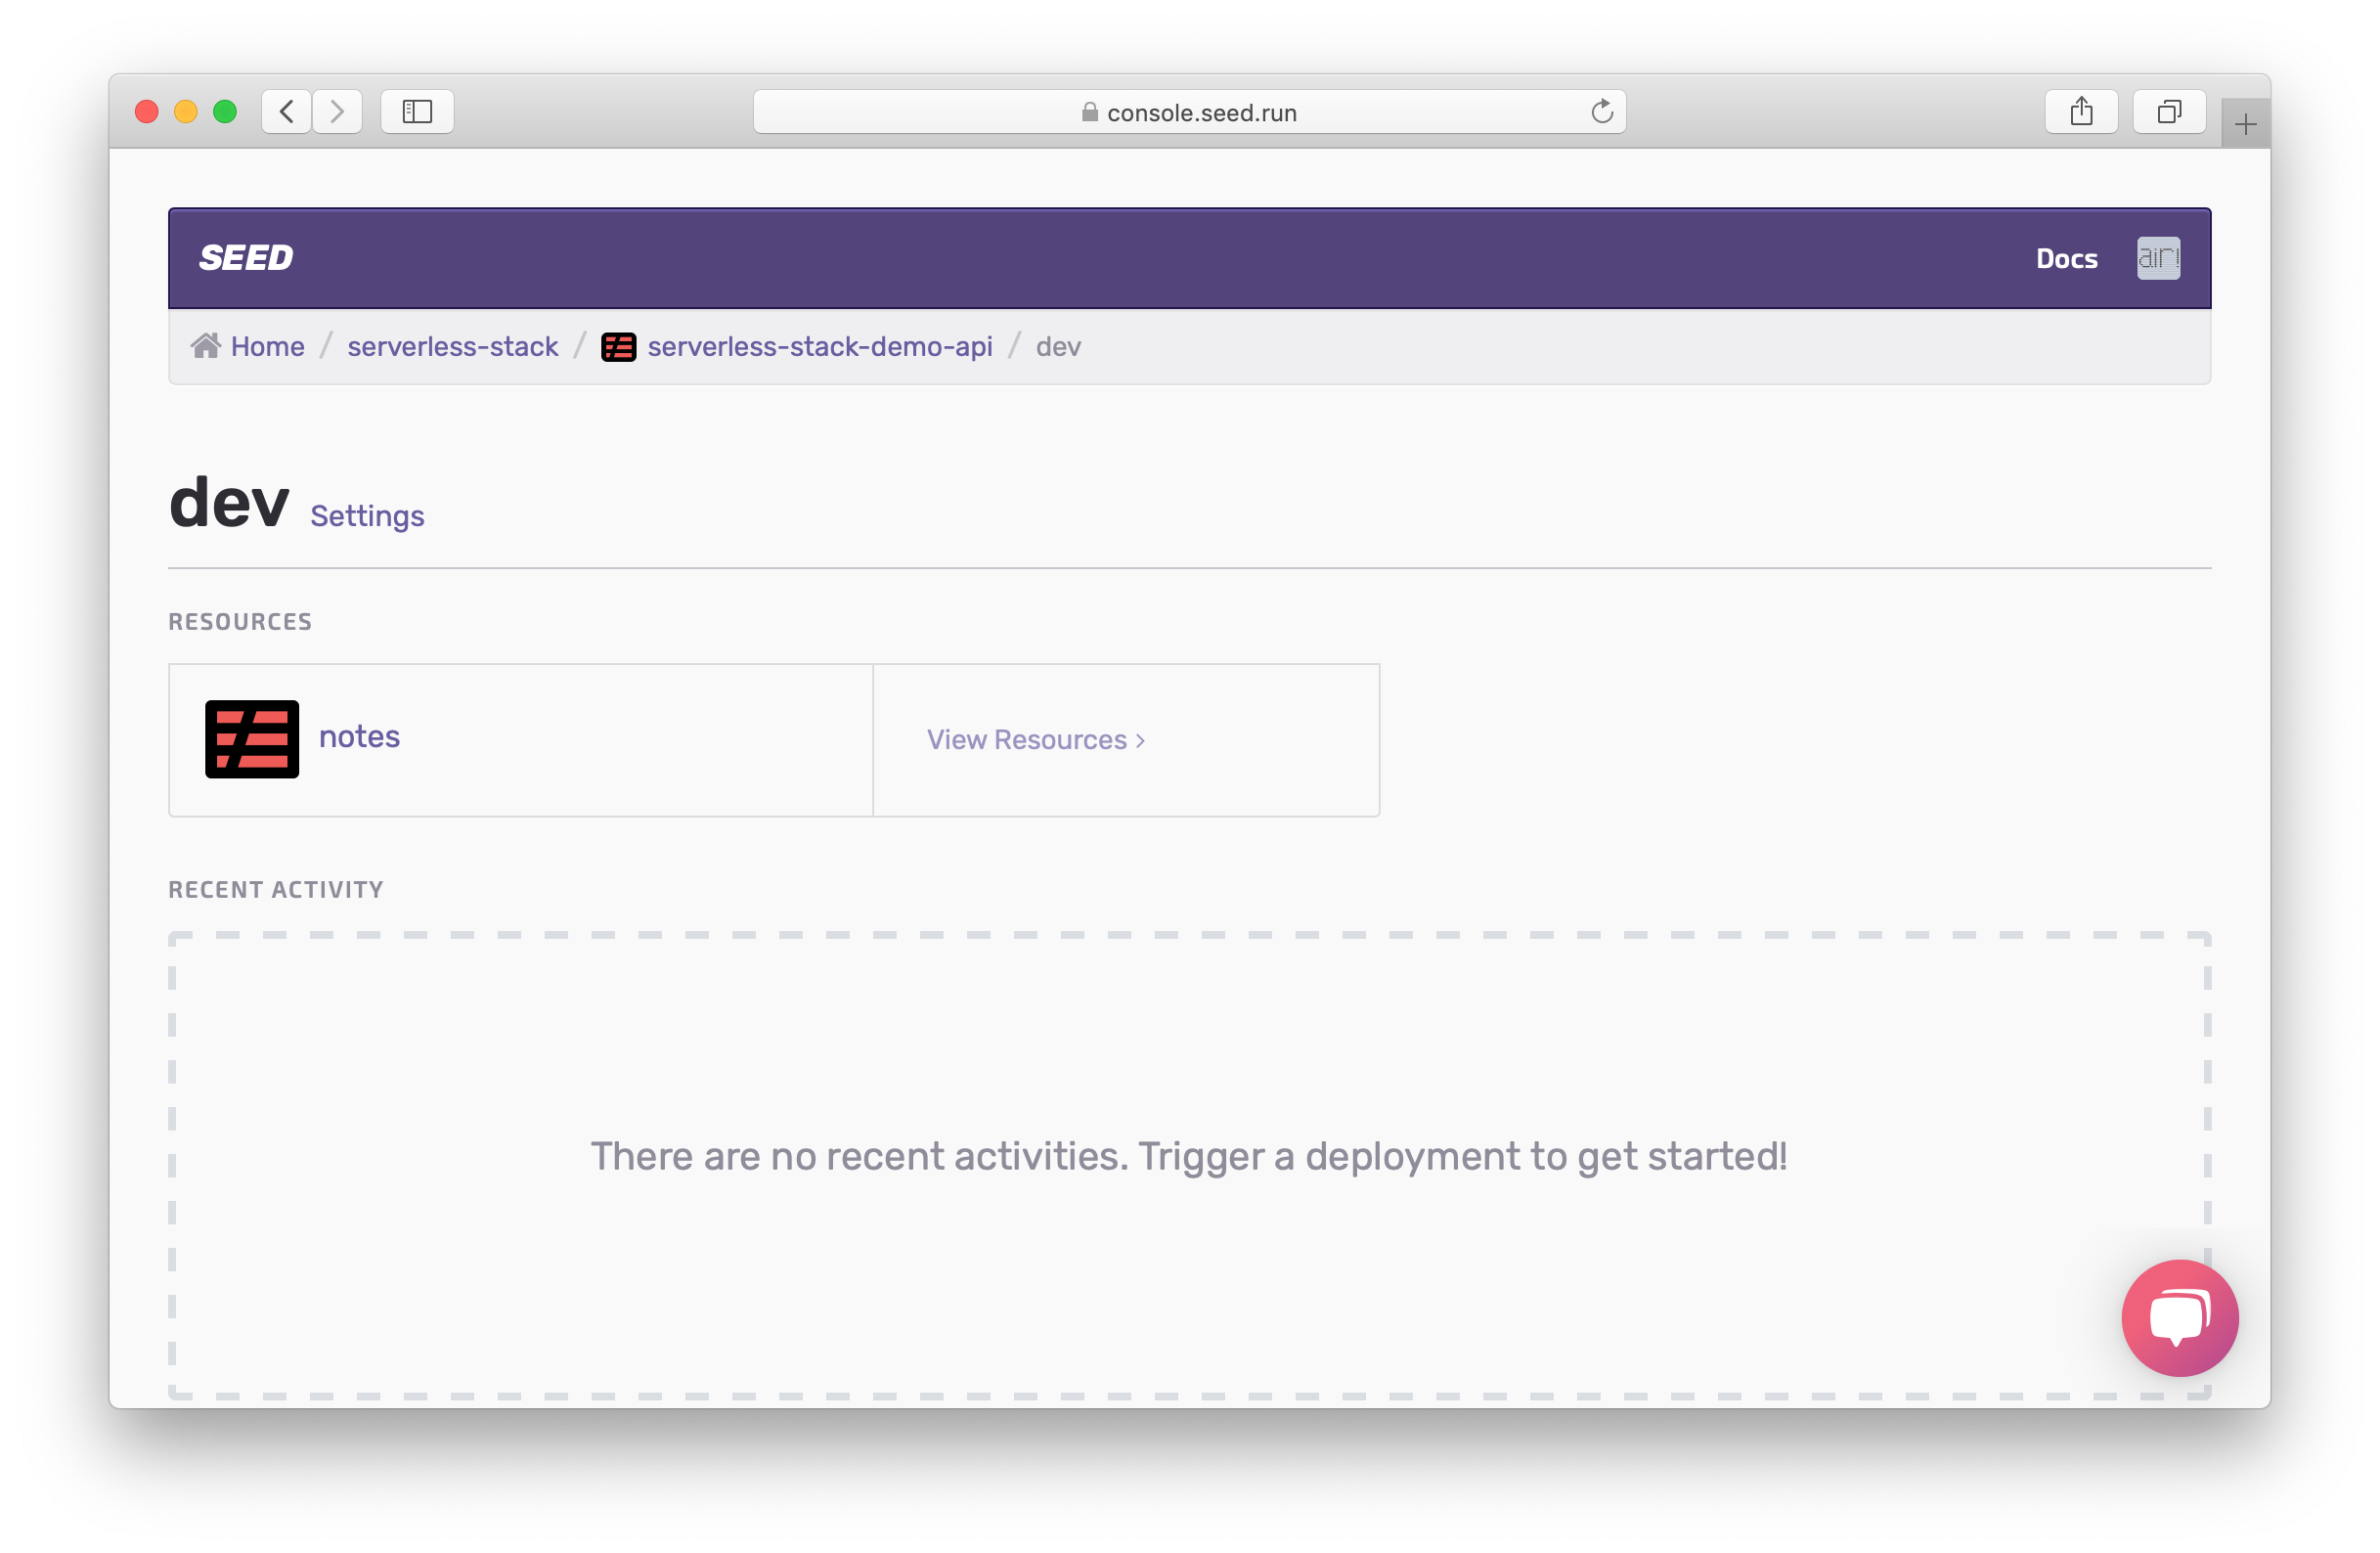
However, before we do that, we’ll need to add our secret environment variables.
For help and discussion
Comments on this chapterIf you liked this post, please subscribe to our newsletter, give us a star on GitHub, and follow us on Twitter.
Brought to you by
